
It has been a while since I posted, but in defence of myself it’s also been a while since I made any nails. Why? You ask.
Children.
Not even my Children, I’ve been helping out my friend babysit this summer, and while I’ve done a lot of babysitting in my day (nannying put me through college), it’s been a while since I spent extended amounts of time with children, and 8 hours a day with two eight year olds has been… extremely draining.
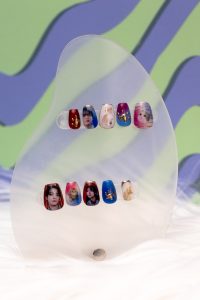
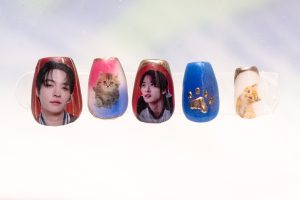
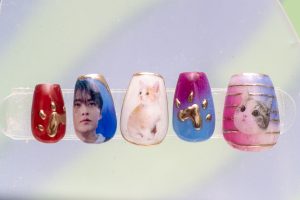
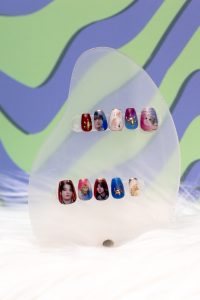
But! I decided I needed to get back into the swing of things, especially since after August they’re back in school and I don’t want to totally lose my nail skills between then and now, so I decided to hop back into it with a fairly simple to do set, some Lee Know Cat Nails! (I swear you can make them too!)
What You’ll Need:
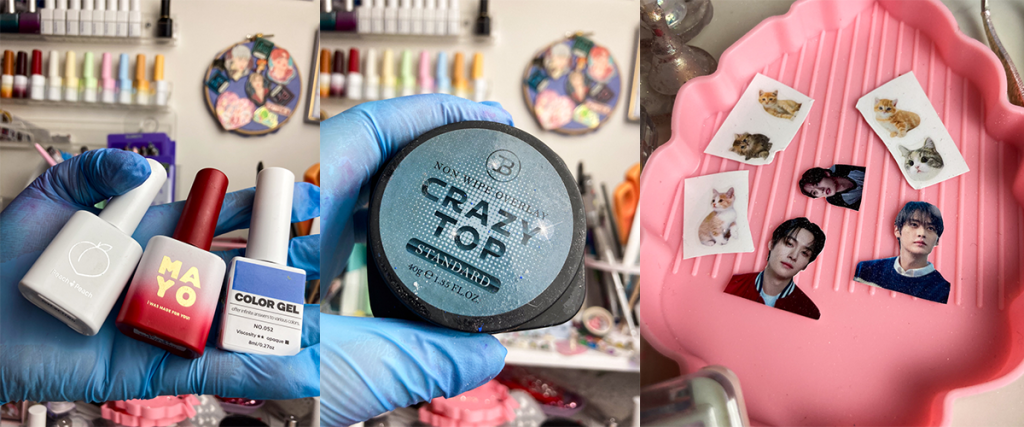
- Set of Press on Nail forms in your size (I used XS Coffin Tips)
- The Following colours of Gel: White, Red, Blue
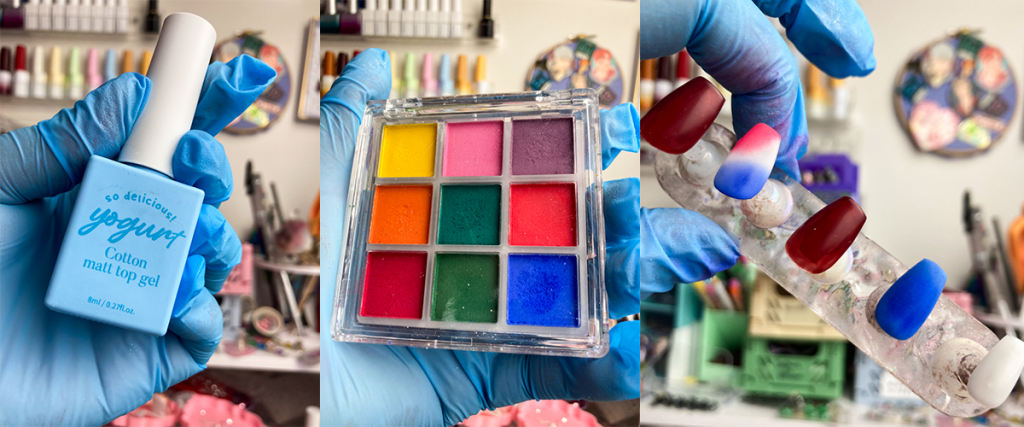
- Gradient Palette with Blue and Red (Optional- you can do gradient with gel if you like!)
- Black non-wipe painting gel for chrome
- Gold Chrome
- Matte Top Coat, Basecoat, & Glossy Top Coat
- Powder Blocking Top Coat (You can use the Buffing method instead!)
- Nail art brushes
- Cat Stickers (I Used these)
- Lee Know Nail decals (Download them at the end of the post!)
- Buffer, Nail File, Nail art Brushes, Isopropyl Alcohol at least 70%
- Dotting Tools (or a toothpick if you’re going real low budget!)
How To Make Em:
1- Prep the nail tips- Grab your sizes, stick em on stands, and give them a gentle buffing so they become matte, and wipe them off with alcohol. Base coat them, and cure them for a full 60 seconds.
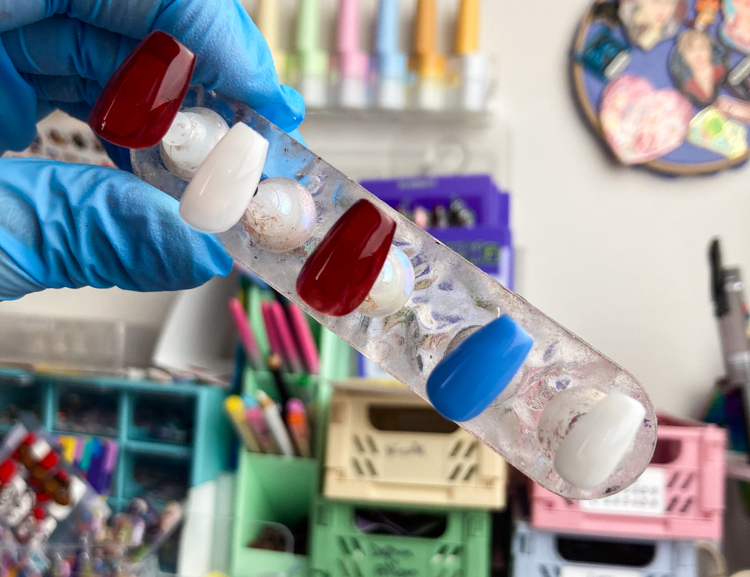
2- Next up is Gel Background Colour. You can get a bit creative with it, but basically you want some red, some blue, and some white. (How patriotic! And neither Lee Know or I are even American) Cure well!
3- Choose which nails you want to put some gradients on. Once you decide, you want to put some regular matte top coat on the nails, and cure them. The matte top coat is instrumental in making sure that there is a surface for smooth powder application. If you don’t want to bother with powder, you can also use gel and gently feather it out or pat it with a sponge to make a gradient, or even use an airbrush, or even not bother with a gradient! The best part about this set is that you can do whatever you like with it and it’ll still look pretty cute, because Lee Know and cats are both pretty cute.
If you ARE using powder, gently pat it in with a soft brush and keep layering until it’s too your liking. Brush off any loose powder, and seal it in with a thin coat of Basecoat, curing before continuing.
4- Next up, it’s time to go to Sticker Town. Wipe down all the nails well with alcohol and let it dry so that there’s nothing preventing good sticking of the stickers and decals. Then, stick the decals to your hearts content. (If you want an overly detailed account of how I make my custom decals, check out this post!) Once you have them place on the nails you want them on, seal them with some basecoat, and cure them.
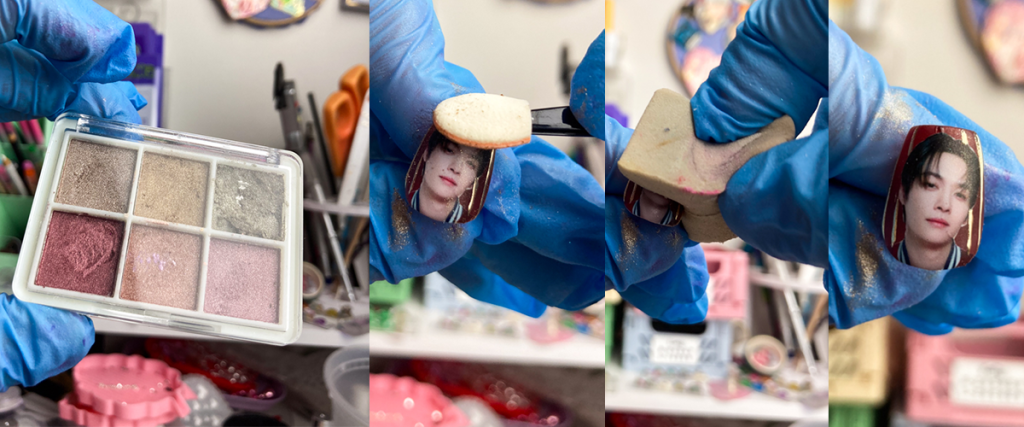
5- It’s time for Gold Chrome! But we have to prep the nails before we chrome the nails. Since this design uses isolated chrome, there’s two ways we can accomplish this.
- Powder Blocking Matte Top Coat: Using a matte top coat specifically for making isolated chrome (I use this one!) cover every nail you’re going to do a design on, making sure not to miss any spots. Aim for a very smooth application! Cure for a full 60 Seconds. Once you remove from the lamp, wipe VERY well with alcohol. Once it dries, the nail should be perfectly matte.
- Buffing Method: Apply non-wipe glossy topcoat to the nails. Cure for a full 60 seconds. Once you remove from the lamp, take a buffer and buff each nail until they are completely matte, leaving absolutely no shiny parts. (Be careful not to buff into the colour below!) Wipe well with alcohol, and you’re ready to go.
6- For the simple designs, grab your non-wipe painting gel, and start doing your design. I kept it simple and did some simple lines, a few french tips, and circling the nails. Once you’re happy with your design, cure it for 60 seconds.
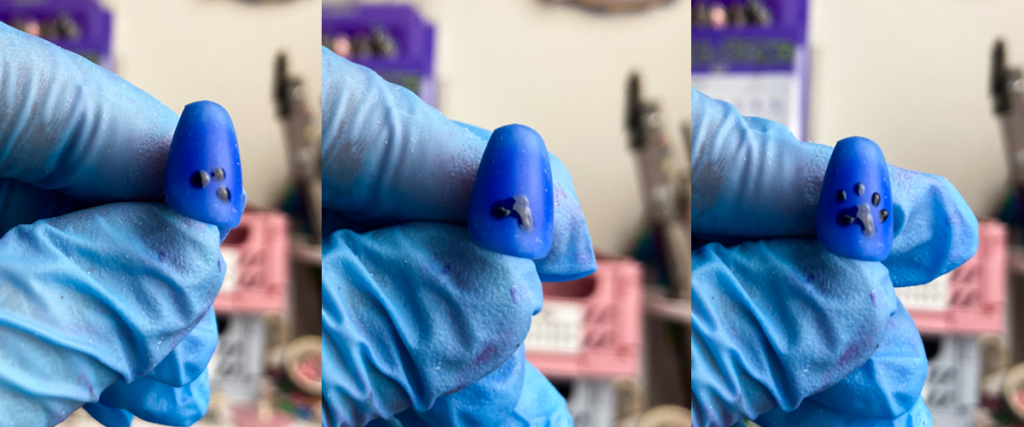
7- For the cat paws, they’re much simpler than they seem. Start by making three dots in a triangular pattern with a dotting tool or toothpick. Connect the dots together to form a sort of blobby arrow shape. Add 4 little ovals on top for the toe beans, and then cure! Here’s a progress image to show what I mean, since sometimes words alone are a bit unclear:
8- After you’re all cured, it’s time to apply the chrome! Using a silicone applicator, an eyeshadow applicator, or even your finger, burnish the chrome into the design. Wipe any excess away with a brush or a makeup sponge (I find a makeup sponge works best for me), and you should have some nice shiny Gold shining up at you! If there is any gold sticking to places you don’t want it to, it’s very easy to remove by wetting a q-tip with some alcohol and gently rubbing it away.
9- Finally, top everything with topcoat! I find that a medium viscosity topcoat works perfectly when you’ve got lots of chrome and decals if you want a nice smooth finish. I always take the time to lightly file all the free-edge of the nails before topping them, just to make sure they’re nice and smooth, and fully cure and wipe with alcohol. And you should have a nice set of cute lil Lee Know nails for your viewing pleasure!
And as always, if you want to make these and want the Decals I used to print, here they are! Just follow the directions on my Decal Post, and you’ll be good to go! Just right click and save as!

Hopefully I can get through this last month of babysitting silliness and get back to more time spent on things to make nails bring joy into the world! If you made these nails, or nails like them let me know! I’d love to see them!
Also! I started a TikTok account for nails (literally the day before I posted this so there’s not much there atm), but if you follow TikTok feel free to Follow me! My first post was these nails haha.
Have a wonderful day, and make your nails be gorgeous this week!